Getting The Most From Your Blog with Odiogo and Feedburner
The mojoPortal content management system blog feature provides built in support for Automatic Podcasting using Odiogo and for tracking your feed using Feedburner. Its ideal to use both of these services together and I will explain the simple steps to set it up.
I'm assuming you already know how to create a page in your mojoPortal site and put an instance of the blog feature on the page, if not see the first video in training videos.
After you have made a post in your blog, right click the RSS icon in your blog and choose "Copy Link Location". This is just copying the url to the built in mojoPortal blog RSS feed.

Next, visit http://www.odiogo.com, and paste (Control V) the url for your feed into the text box at the top of the Odiogo site.

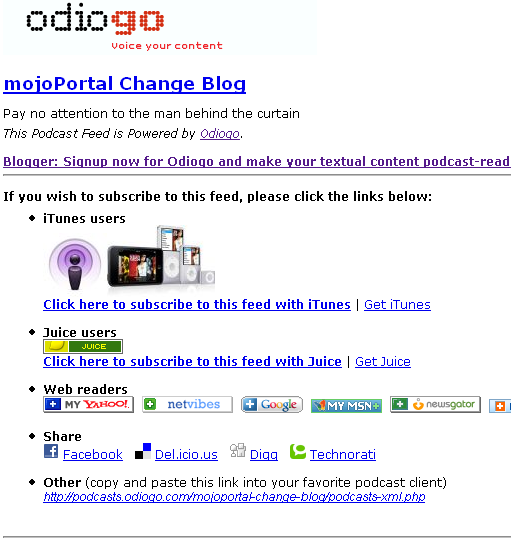
After a while you will receive notification from Odiogo of your new Podcasting page and Podcasting feed. Visit you podcasting page it should looks something like this:

Notice the link at the bottom in the bullet point labelled Other. That is your new RSS feed url created by Odiogo, it has the podcast mp3 links embedded. Copy this link and paste it into Feedburner. Feedburner will process the feed and give you yet another url for your RSS feed. This url contains the podcasts and allows you to track statistics using Feedburner.
Now we need to configure your mojoPortal Blog to take advantage of your Odiogo and Feedburner services. Click the gear icon next to the Title of your Blog to get to Module Settings for the blog.
You can see the gear icon in my example screen shot here:

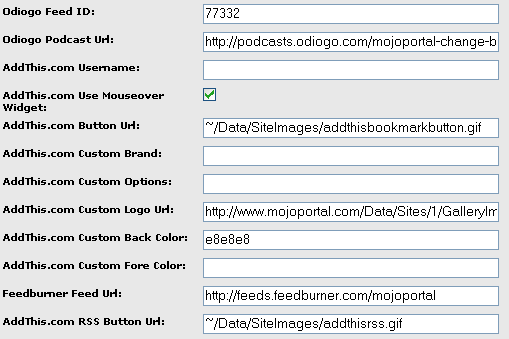
After clicking the gear icon you'll see a lot of settings for the blog.

Enter your Odiogo Feed ID.
Enter the Url for your Odiogo Podcast Page.
Enter your Feedburner Url.
You can also enter your AddThis.com user name to automatically create buttons to help promote your blog using popular bookmarking services.
Save the settings and you will see the listen now button for Odiogo and you will be able to monitor your readership stats using feedburner.